Drywall Installation Mistakes Carlsbad Homeowners Regret (And How Pros Avoid Them)
Bright coastal light in Carlsbad makes every wall seam and fastener dimple easy to spot. If you’re planning a remodel or addition, the safest path to a clean, paint-ready surface is working with a trusted team that handles planning, hanging, and finishing end to end. See how a pro approach on drywall installation and finishing prevents the issues that lead to call-backs and repainting.
Below are the mistakes we’re asked to fix most often around Aviara, La Costa, Bressi Ranch, Calavera Hills, and the Village, plus how experienced crews sidestep them from day one.
Why Drywall Installation Quality Matters In Carlsbad
Carlsbad homes get lots of raking sun, seasonal marine layer, and the occasional dry Santa Ana winds. That mix can reveal even tiny imperfections and stress weak joints over time. Good drywall work protects your paint, trim, and resale value, and it keeps long sightlines in open plans looking smooth.
Mistake 1: Ignoring Framing Irregularities
Drywall follows what’s behind it. Crooked studs, uneven corners, or missing backing create wavy walls and weak joints that crack later. Pros start with a straight substrate, verify backing at outside corners and transitions, and align sheets so seams land on solid support. Never ignore framing alignment or you’ll fight visible seams forever.
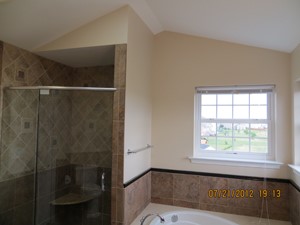
Mistake 2: Using The Wrong Drywall Type
Bathrooms, laundry rooms, and garages in Carlsbad have different moisture and safety needs than bedrooms or hallways. Moisture-prone spaces need the right panels and detailing to discourage mildew and warping. A seasoned crew specifies materials room by room, then finishes them to suit your lighting plan. For a deeper dive on finish levels in our coastal light, see this overview of level 4 vs. level 5 drywall.
Mistake 3: Poor Fastener Placement That Leads To Nail Pops
Overdriven fasteners break the paper face. Underd riven fasteners stand proud and telegraph through paint. Both become nail pops months later. Professional installers use depth-controlled drivers, consistent spacing, and solid backing so fasteners hold without tearing paper. That careful approach stops the cycle of patching little circles after your first season of humidity changes.
Mistake 4: Lining Up Seams And Creating Four-Corner Joints
Stacked seams and four corners meeting in one spot become weak points you can see in grazing light. Crews that work North County day in and day out stagger seams and plan layouts to avoid stress lines along long walls and ceilings. The result is a stronger, cleaner canvas for paint.
Mistake 5: Rushing Taping, Mudding, And Drying
Joint treatment is where walls are won or lost. Skipping a coat, sanding too soon, or trapping moisture under compound leads to ridges, bubbles, and flashing after paint. A pro schedule sets coat widths, cure times, and sanding sequences that fit Carlsbad’s climate. Control light and humidity during finishing and those seams disappear when the sun shifts across the room.
Mistake 6: Expecting A Smooth Finish Without Level 5 Prep
Many modern Carlsbad homes favor smooth walls. Smooth is stunning but unforgiving. Where sun pours in near big sliders or skylights, a full skim coat often makes the difference between gallery-clean and “I can still see a line.” If your design calls for sleek walls and higher-sheen paint, a professional will recommend where level 5 pays off and where a refined texture is the smarter choice.
Mistake 7: Choosing The Wrong Texture For Your Light
From Aviara’s open great rooms to compact condos in the Village, texture choice affects how your walls look at dawn and dusk. Orange peel, knockdown, lace, or smooth each interact with light differently. Wall textures applied by specialists can soften harsh glare, blend previous repairs, and keep high-traffic areas looking fresh. Choose a finish that fits your light so seams don’t show up when the sun slides low.
Mistake 8: Skipping Dust Control And Protection
Dust embedded in wet mud or paint leaves pockmarks and streaks. Pros stage rooms, protect floors and returns, and sand with extraction to keep air clear. That means your paint lays down evenly and your HVAC doesn’t circulate fine dust for weeks.
Mistake 9: Inconsistent Corners And Beads
Loose or crooked corner bead shows up as dents or razor-sharp edges along hallways and stairwells. Experienced finishers set beads true, fasten properly, and feather wide so light glides over those edges. It’s subtle, but you’ll notice the difference every time you walk by.
How Pros Prevent Uneven Seams And Nail Pops
- Plan the layout so seams avoid high-glare zones and land on solid backing.
- Specify the right panel type and thickness for each room’s moisture and safety needs.
- Use depth-controlled fastening and consistent spacing to protect the paper face.
- Stage, cure, and sand with climate control so compound dries evenly.
How To Spot Trouble Before It’s Too Late
You don’t need to swing a tool to catch red flags early. If you see stacked seams on tall walls, corner beads that wander, or dimples around fasteners before paint, press pause and ask for a walkthrough. It’s faster to correct issues before primer than after your first coat reveals everything.
Finish Levels And Lighting: What Works Best In Carlsbad
Rooms with skylights, clerestory windows, and wall-wash lighting often benefit from a level 5 skim for a flatter plane. Bedrooms or offices with softer light usually look great at level 4. For families that prefer durability and easy touch-ups, a refined orange peel or knockdown can be a smart call. To explore the differences, compare real-world examples of level 4 and level 5 finishes under coastal light.
What A Professional Drywall Contractor Brings
- Room-by-room material matching for moisture, noise, and safety.
- Seam layout that respects long sightlines and window orientation.
- Clean job sites with dust control and careful protection.
- Clear communication on schedule, access, and touch-up visits.
If you want a single team that owns quality from framing checks through final sanding, look to drywall installation and finishing handled by specialists who build for Carlsbad’s climate and light.
Local Context: Neighborhoods, Seasons, And Expectations
In La Costa and Bressi Ranch, large west-facing windows can create low-angle glare that exposes even minor ridges. In Olde Carlsbad cottages, tight rooms and layered remodels demand careful transitions where old plaster meets new board. Winter marine layers slow dry times, while warm Santa Ana spells speed them up. A seasoned crew adapts the process so results stay consistent year-round.
If you’re comparing options, a good baseline is a smooth level 4 in calmer spaces and texture where durability matters. When you prefer museum-smooth walls for a modern look, ask your estimator to review lighting at different times of day. Always match materials to the room and you’ll avoid most regrets.
Ready To Love Your Walls In Every Light?
For homeowners who want clean lines and paint that lays down perfectly, partner with Nu Wall Inc. Start with a quick conversation and an on-site review of your rooms and lighting. You can call us at 760-455-9793 or learn how our process delivers consistent, long-lasting results by visiting our drywall installation and finishing page.
If you’re just beginning research, you can also learn what sets local pros apart by exploring drywall installation in Carlsbad, CA resources on our site. When you’re ready, Nu Wall Inc has a streamlined plan to take you from first walk-through to smooth, paint-ready walls without surprises.
Looking for a professional Carlsbad Drywall and Plaster Company GIVE US A CALL TODAY!